

Oobabooga’s text-generation-webui is a very convenient way to load and run an LLM model. Runpod.io is one of the GPU clouds that provides fast docker image boot-ups. If you would like an easy and fast way to boot up an open-source LLM model, we recommend trying runpod.io & text-generation-webui combination. In this article, we’ll go step by step to bring up a model on runpod and chat with it using text-generation-webui.
1. Register a Runpod.io Account
Please consider using our referral link here to register runpod.io. It helps us to continue producing high-quality blog posts.
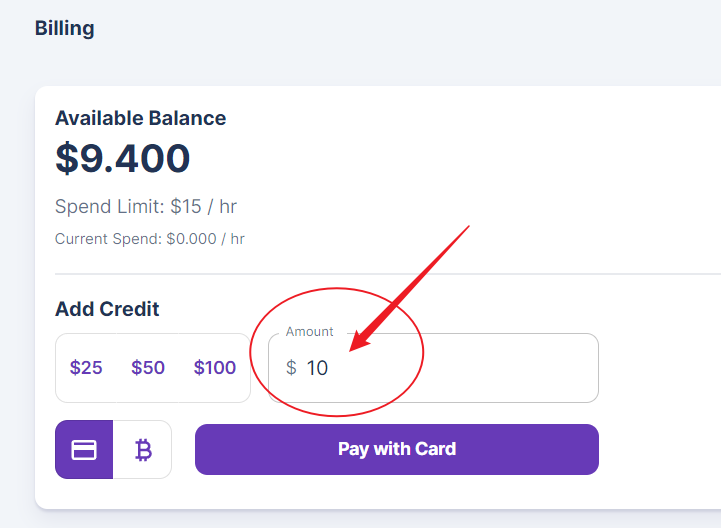
Unfortunately, runpod.io does not offer any trial period or credit. After registering, go directly to the billing section. You do not have to add at least $25. You can edit the amount box to change it to 10. But this is the lowest amount you can go.
2. Runpod Secure Cloud vs. Community Cloud
The secure cloud performs better but is more expensive than the community cloud. Another key difference is that network volume can only be used with network volume.
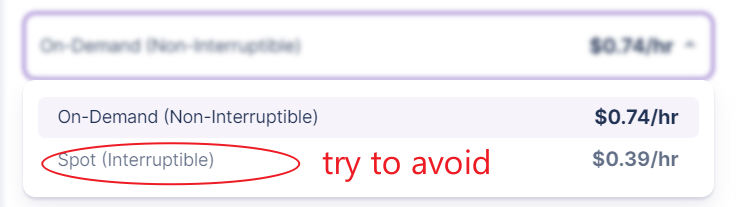
Use the community cloud if you are budget sensitive and do not need network volume. But we do not recommend interruptible mode to save even further. At least in the summer of 2023, GPU cloud is highly demanded. Your virtual host may be forcibly shut down, and the lost time and work do not justify the money you have saved.
3. Pod Volume vs. Network Volume
There are two types of volumes in runpod.io. The following table summarizes the difference between pod volume and network volume.
| Pod Volume | Network Volume | |
| Attach | Physically attached to the GPU instance you brought up the first time. | Not attached to any GPU instance |
| GPU Flexibility | You cannot modify the GPU type once it’s created. | You may attach it to any available GPU. |
| GPU Availability | Higher chance of unavailability because of the physical bound. | As long as there is GPU available, you can start it. |
| Price | $0.015 / 100GB / hour when the disk is running $0.028 / 100GB / hour when the disk is idle | ~$0.01/ 100GB/ hour |
| Cloud | with Secure or Community Cloud | Only with Secure Cloud |
| Data Share | N/A | Easily share data between instances |
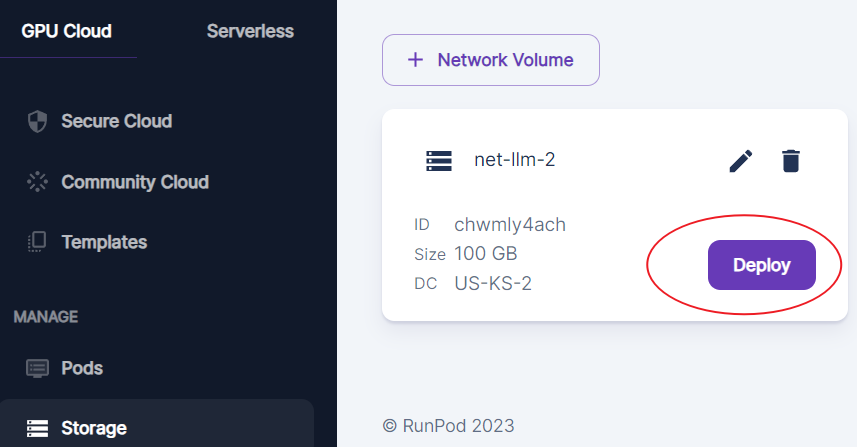
If you are not that price sensitive, we always recommend you work with network volume on the secure cloud. Remember always to select network volume when deploying or deploying directly from the network volume if you intend to use it.
4. Choose a Proper GPU
You usually need only to make sure you have big enough GPU memory to run your LLM model. If you are concerned about other parameters of GPU, this post is too beginner-level for you.
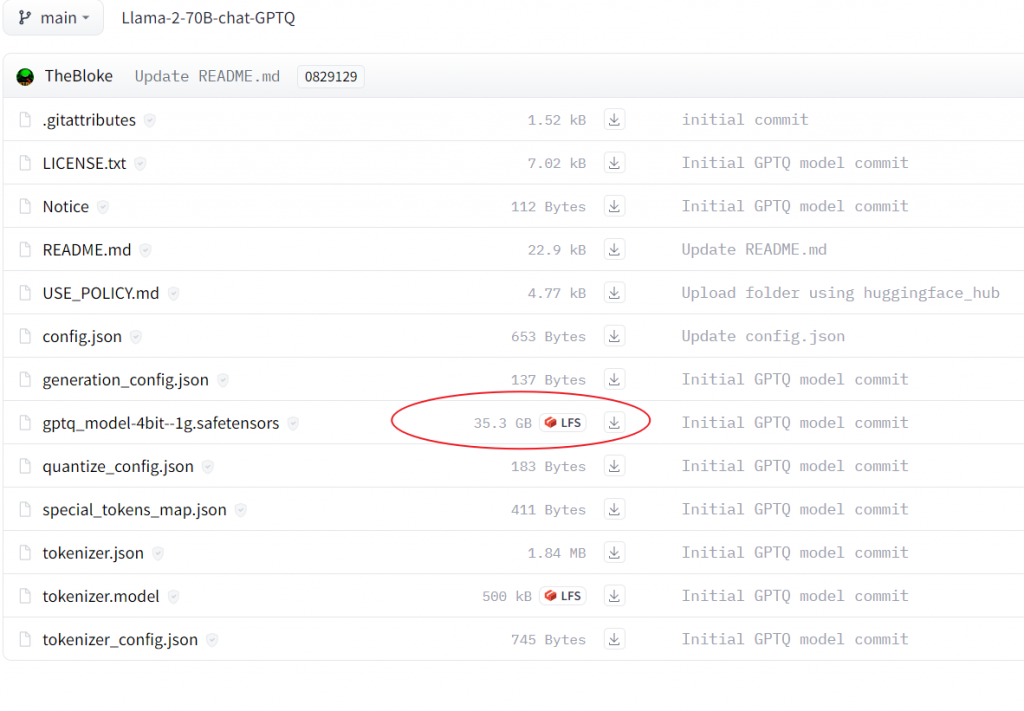
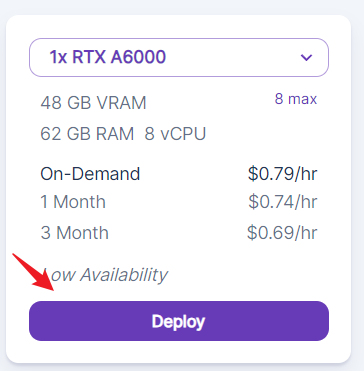
As a rule of thumb, look at the size of the model files you will download from hugging face. For example, for LLaMa 2 70B Chat GPTQ model, the model file is 35GB, then you’ll need 48GB GPU memory and at least 50G disk to load the model.
Choose any GPU(s) equal to or larger than 48G, then click deploy. Nvidia RTX A6000 is usually a good option for 48G GPU within a reasonable price range.
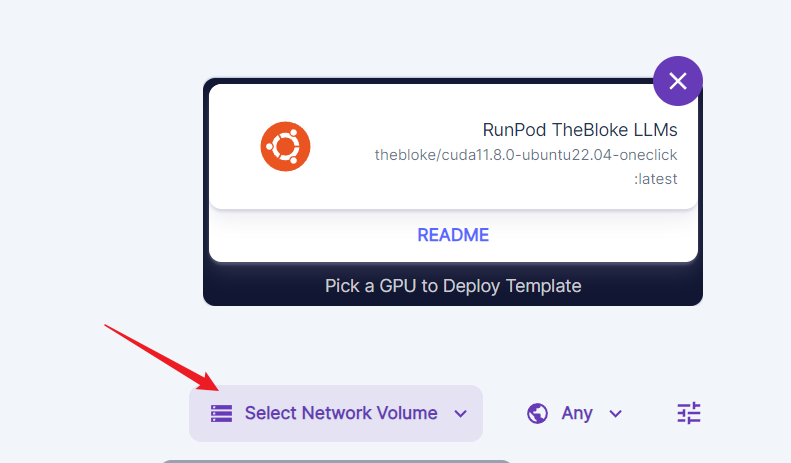
5. Choose an LLM Template
You must use a template to start a pod. A template is a pointer to a docker image and other configurations, such as exposed ports, mounted disk, and environment variables.
In the search box, search for ‘bloke’. The magnificent (well, he deserves this adjective) thebloke publishes not only numerous models on Hugging Face but also runpod template and its docker image to the community.
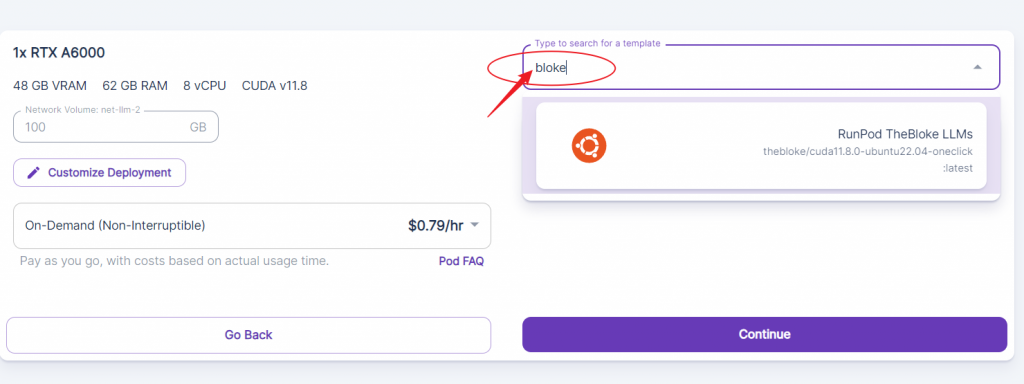
This docker image brings up the latest text-generation-webui, and you do not need to install anything and are ready to use your first LLM model already.
6. Connect to text-generation-webui
Click connect after you deploy the GPU with thebloke’s LLM template.
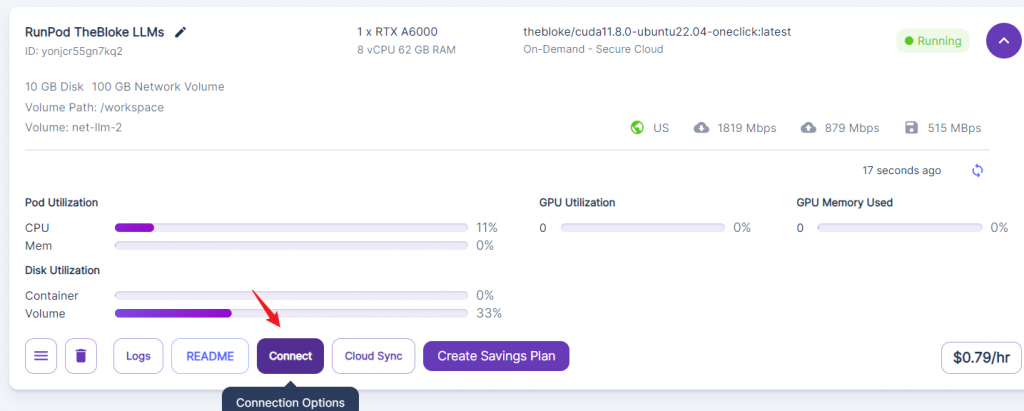
Then connect to HTTP port 7860. The template starts the text-generation-webui on this port.
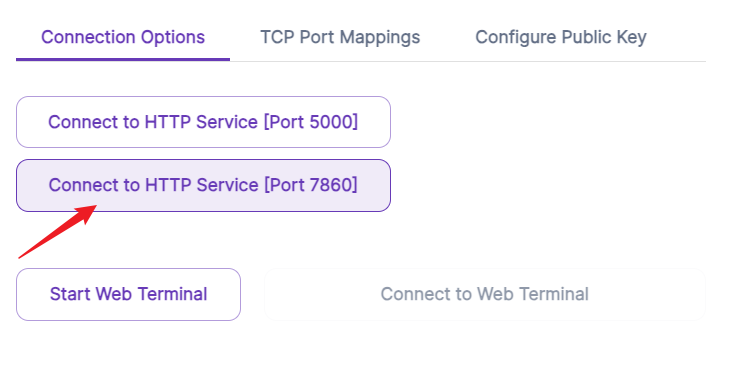
Wala! This is magic. You have a public URL now, and your text-generation-webui is up.

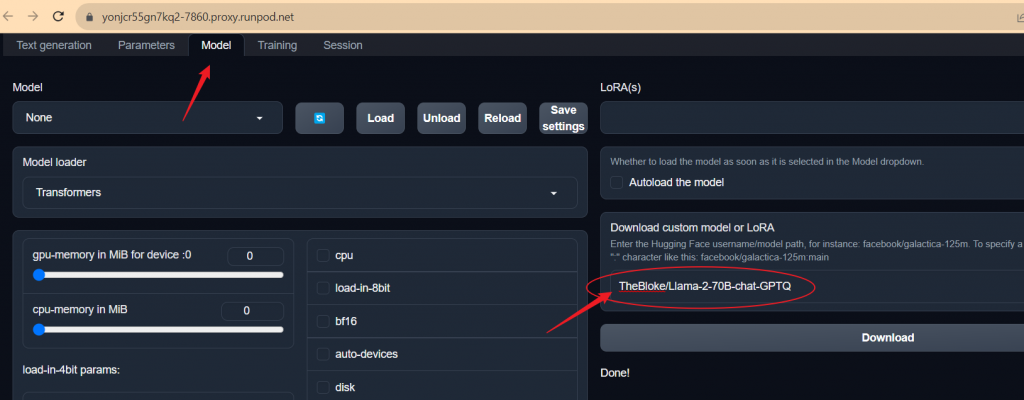
7. Download an LLM Model
We’ll use LLaMa 2 70B Chat GPTQ as an example. Go to the model’s Hugging Face page, and copy the model’s full name. It is TheBloke/Llama-2-70B-chat-GPTQ in our case.
Click the Model tab of the text-generation-webui, copy the model’s full name to the download box, and click download. Downloading this 35GB model to the pod takes between three and five minutes.
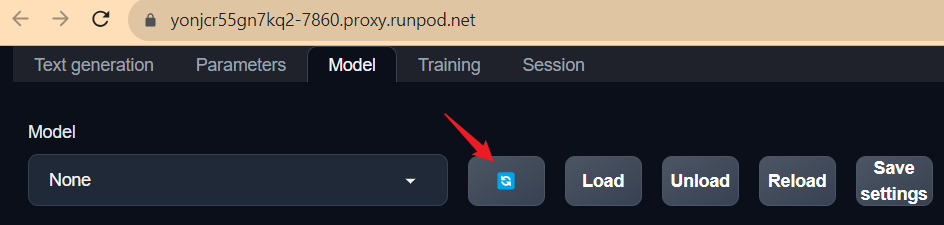
8. Load the Model
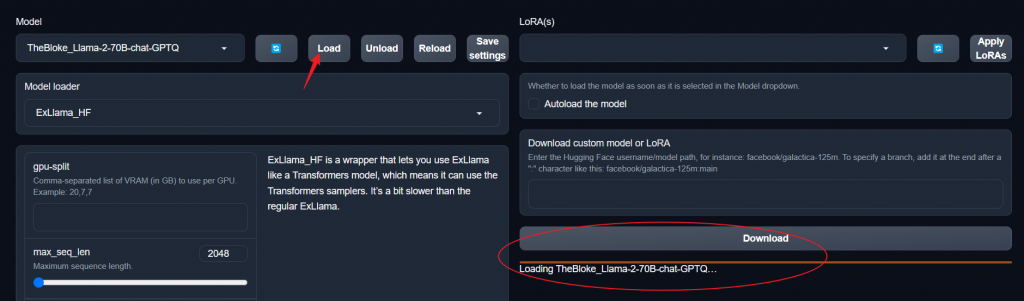
Refresh the model list so that you can choose the model to load.
Choose the model you just downloaded.
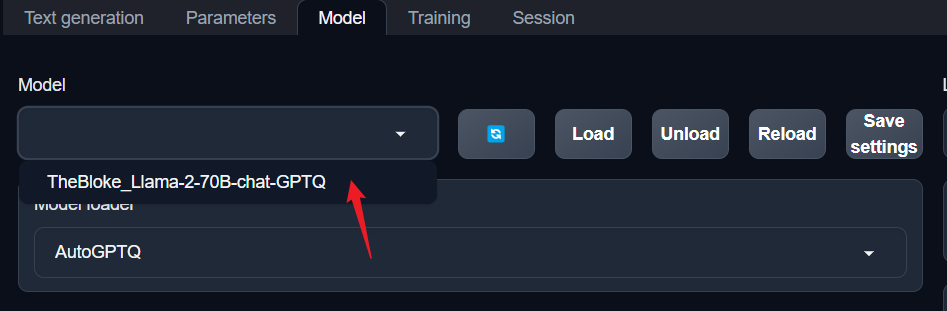
For LLaMa 2 70B, you’ll need to use either ExLlama or ExLlama_HF as the model loader.
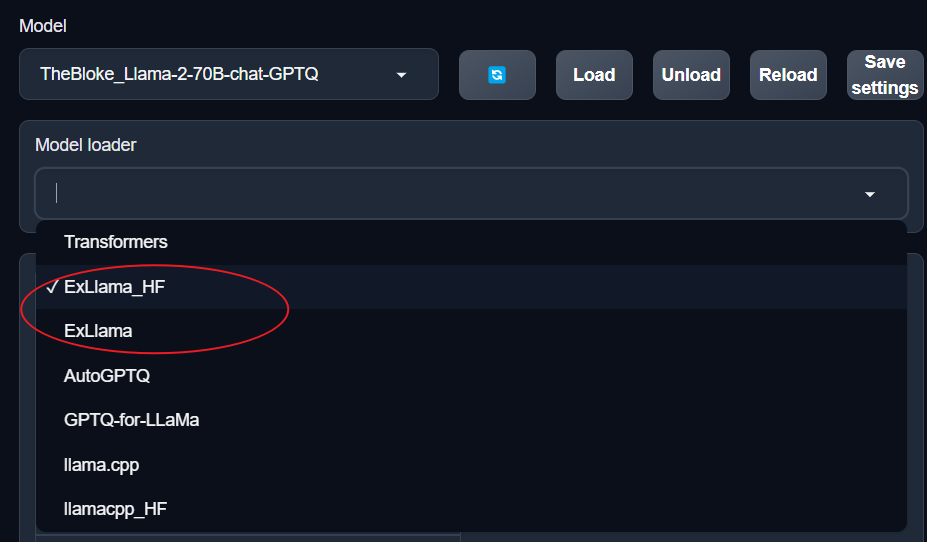
Then, click load. Loading the model to the memory takes about two to three minutes.
9. Inference with the Model
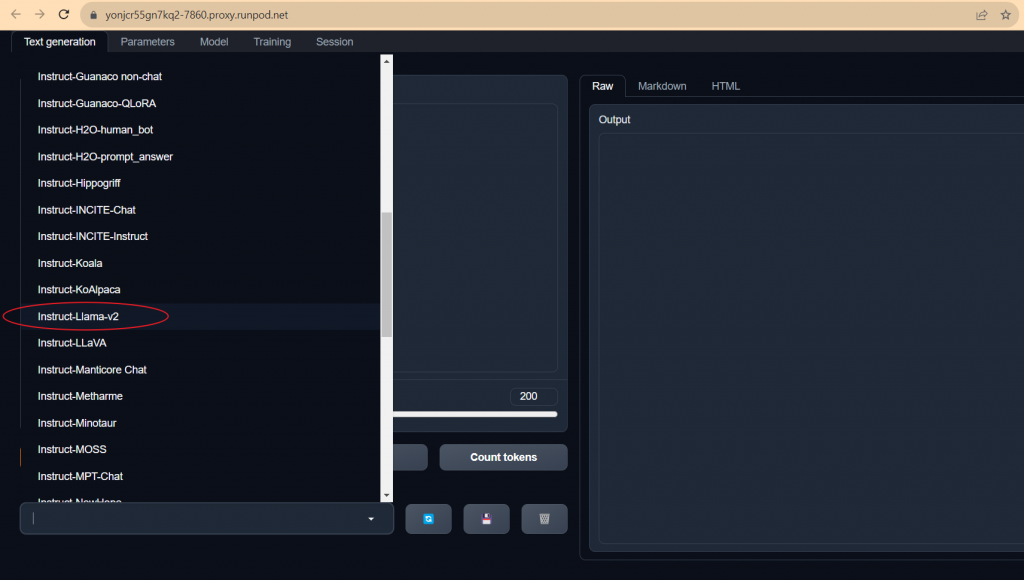
Switch to the Text generation Tab, then choose the proper prompt format. Some model needs specific prompt format, while some not. LLama 2 accepts its format or plain text. But its format gives better inference control.
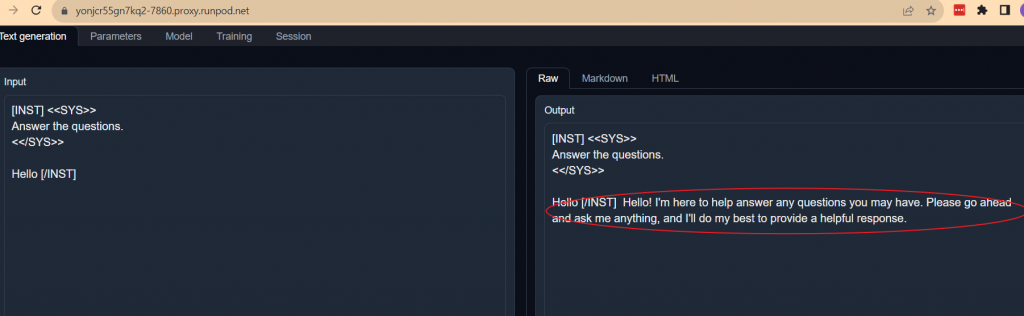
The LLaMa 2 format is not magic. SYS is easily recognized as the abbreviation for System. INST is for Instruction (this one is harder).
[INST] <<SYS>>
Answer the questions.
<</SYS>>

Hello [/INST]
Click Generate. You’ll be able to see the response on the left side if everything goes smoothly so far.
Enjoy and talk with your model. We’ll cover more about how to change parameters and fine tune the model in other posts. Please do come back to check out our latest post about AI. Once again, Please consider using our referral link here to register runpod.io to support our blog.
[Disclaimer: Featured image is proudly generated by Midjourney]