

When it comes to merging the power of Linux with the user-friendliness of Windows, users often find themselves at a crossroads. The traditional methods, such as setting up a dual boot system or using a virtual machine, serve their purposes. However, with the introduction of Windows Subsystem for Linux (WSL), Windows 11 has taken a gigantic leap in bridging the gap between these two OS giants.
1. What is WSL?
Windows Subsystem for Linux, often abbreviated as WSL, is a compatibility layer developed by Microsoft. It allows users to run a GNU/Linux environment directly on a Windows PC without the overhead of a virtual machine or dual-boot setup. In simpler terms, WSL lets you run Linux binaries natively on your Windows machine.
The latest WSL is version 2 as of August 2023.
1.1 Why WSL over VMs or Dual Boot?
- Performance: Virtual machines are notorious for consuming significant system resources. They emulate an entire computer system, from its hardware to software. WSL, on the other hand, only emulates the Linux kernel, making it much lighter on resources.
- Integration: With WSL, you can run Linux commands alongside your Windows apps, providing a seamless blend of both environments. You do not need to reboot (like with a dual boot) or switch between VM windows.
- File System Access: Accessing files between VMs or a dual boot system can be clunky. With WSL, you get native access to your Windows file system, making file transfers a breeze.
- Developer Friendly: The ability to run Linux tools and commands alongside Windows applications is a game-changer for developers. It streamlines workflows, especially when dealing with cross-platform development.
2. Installing WSL on Windows 11
The official WSL document gives more details, but the following is the essential you’ll need to know.
2.1 Install and start WSL
- Open Windows PowerShell as an administrator.
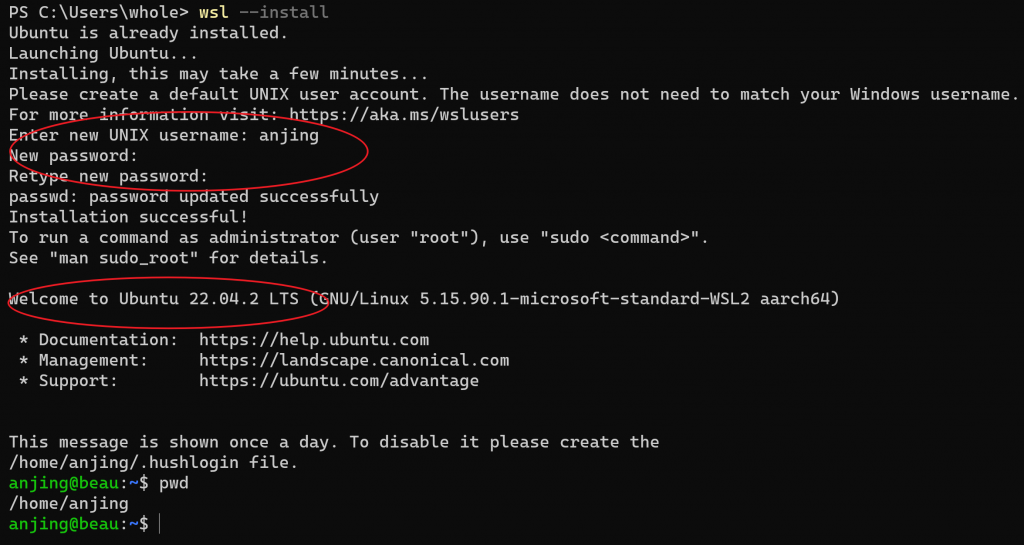
- Run the command: wsl –install This will enable the required features and even download the latest Linux kernel.
wsl --installUnless you want to specify any particular Linux distribution outlined in the next subsection, WSL will install Ubuntu, which is usually the latest of Ubuntu LTS.
The installation will ask you to set up your Linux username and password. After that, you’ll log in to the Linux and in the bash prompt.
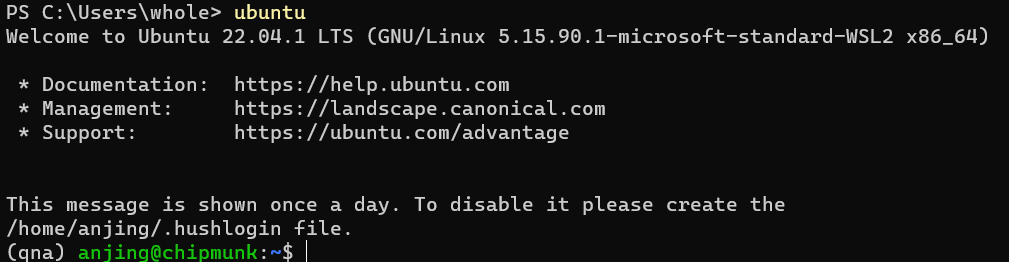
Believe it or not, it’s this simple. Now you are ready to start Linux already. Just type ubuntu either in Windows Powershell or Windows Command Prompt.
ubuntuFor first time user,
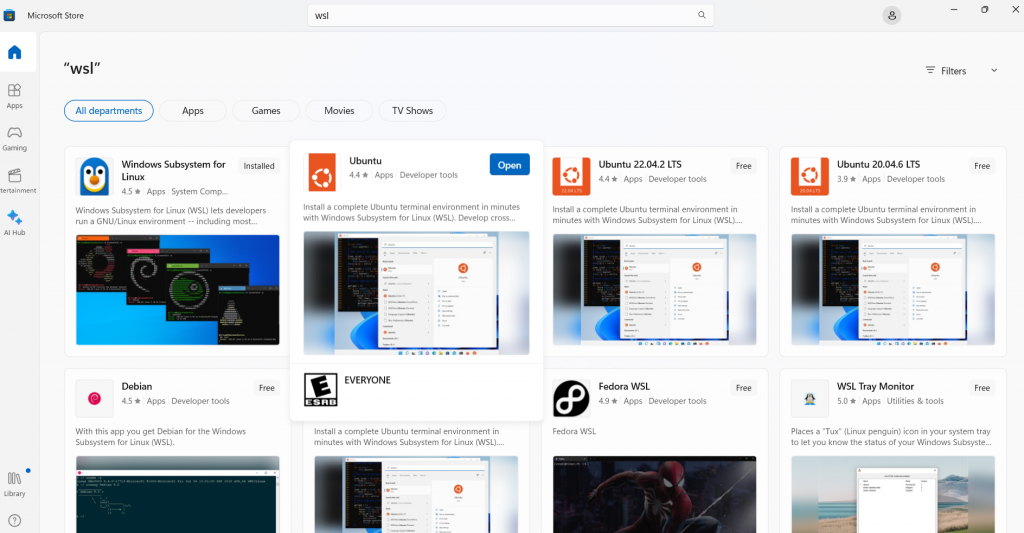
2.2 Choose Your Linux Distro
Head to the Microsoft Store and search for wsl. You’ll see available Linux distributions for Windows.
You may also run wsl –list –online or wsl -l -o to see the list.
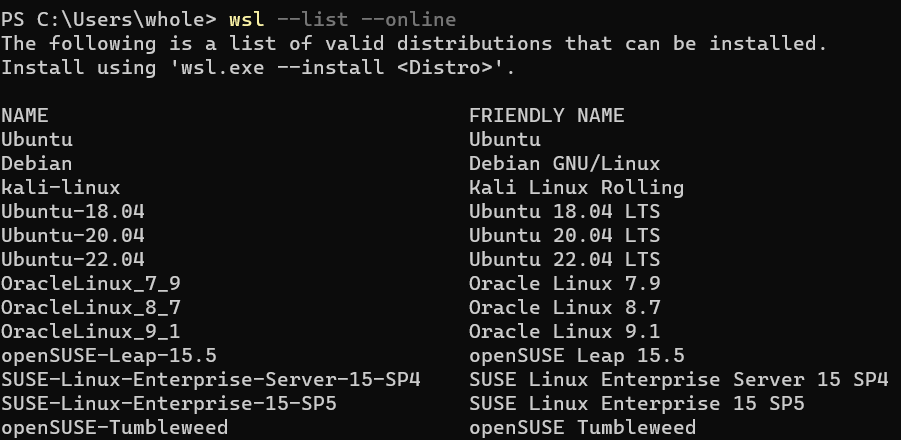
To change the distribution installed, enter: wsl --install -d <Distribution Name>. Replace <Distribution Name> with the name of the distribution that you would like to install.
Recommended Developer Setup
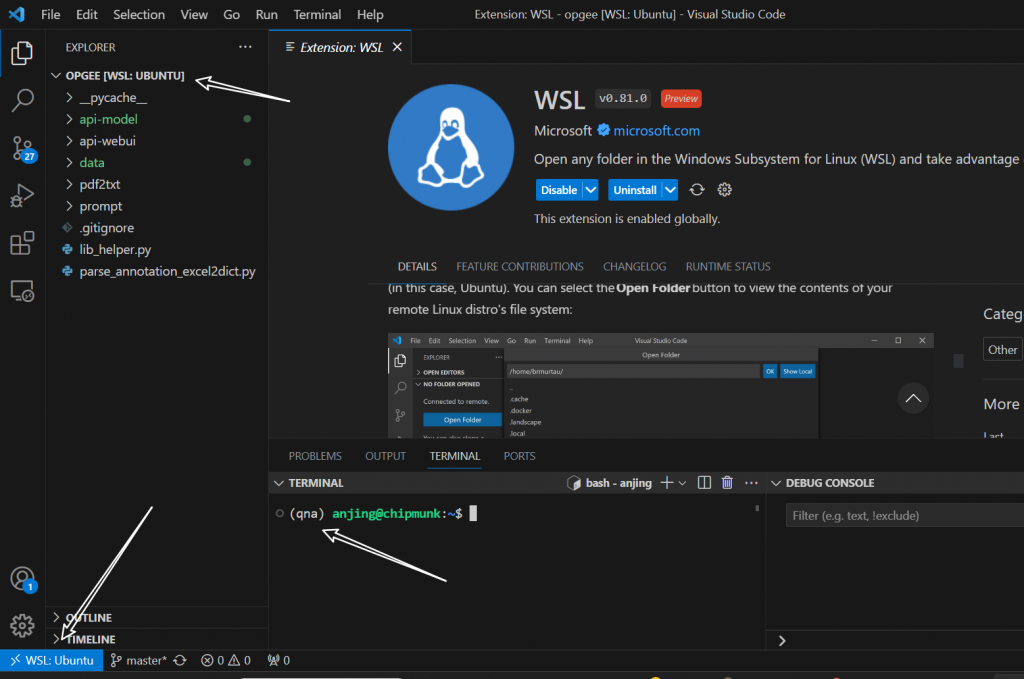
One of the standout features is the synergy between WSL and Visual Studio Code. Developers can use Visual Studio Code to edit source code in WSL.

You edit the source code, and the environment is set up inside WSL like a native Linux. To access the files, use the following path: \\wsl.localhost\Ubuntu\home.
You may also install the VSC WSL extension to have VSC better integrated with WSL. The terminal then becomes the Linux environment. But if you get used to debugging directly inside the WSL command line, you do not have to install this extension.
[…] You need to make sure you have Python installed directly on Windows. The easiest way to install Python nowadays is through the Microsoft store. Search for Python in the store and install the latest Python. Please note that we need Windows-native Python, not Python, under Windows Subsystem for Linux. […]
[…] the use of WSL (Windows Subsystem for Linux) for development becomes increasingly popular among programmers, many […]