As the use of WSL (Windows Subsystem for Linux) for development becomes increasingly popular among programmers, many AI engineers are adopting WSL and Visual Studio Code as their preferred environment for training machine learning models. This article explores the first question that comes to mind for the AI programmer: how to install CUDA on WSL.
What’s Inside
1. Short Answer
You DO NOT need to install CUDA on WSL. CUDA is installed with the Windows Nvidia driver and then is mapped inside WSL.
2. Long Answer
We’ll look into details to understand how Windows achieves this.
2.1 What is CUDA?
CUDA (Compute Unified Device Architecture) is a parallel computing platform and programming model developed by NVIDIA for general computing on GPU. This definition is a little abstract, but the following diagram (excerpt from one of NVIDIA’s official videos) explains CUDA better so you can easily comprehend it.

Please note that NVIDIA Display Driver and CUDA Toolkit are separately versioned and we’ll see both versions in the following sections.
2.2 Check NVIDIA Driver on Windows
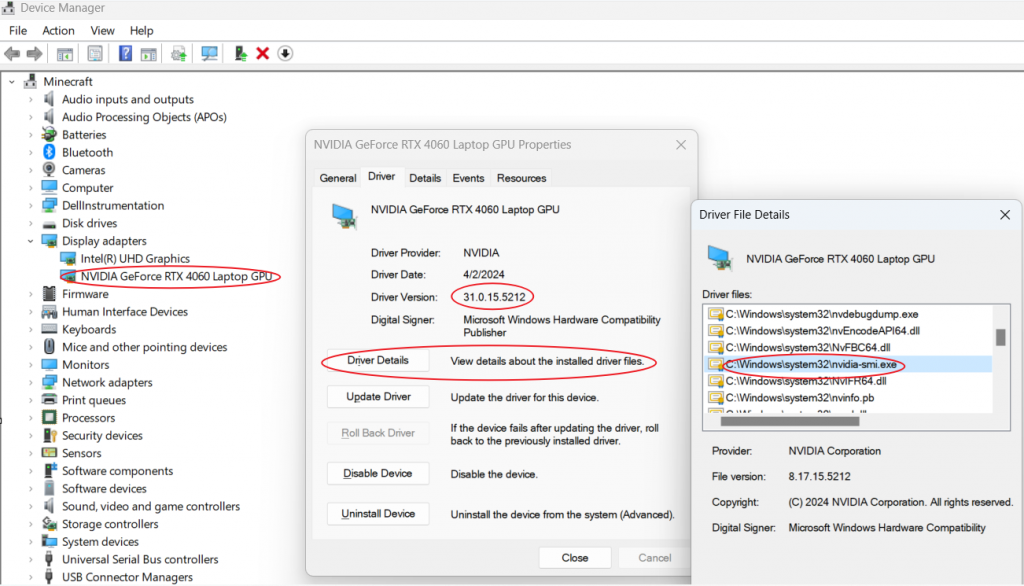
There are two ways to check the NVIDIA drivers. You can open the Device Manager and find your NVIDIA graphic card to show its properties. In my case, the driver version is 31.0.15.5212. If you click ‘Driver Details’, you can see where the driver files are installed. Make sure nvidia-smi.exe and libcuda.so present in the file list.
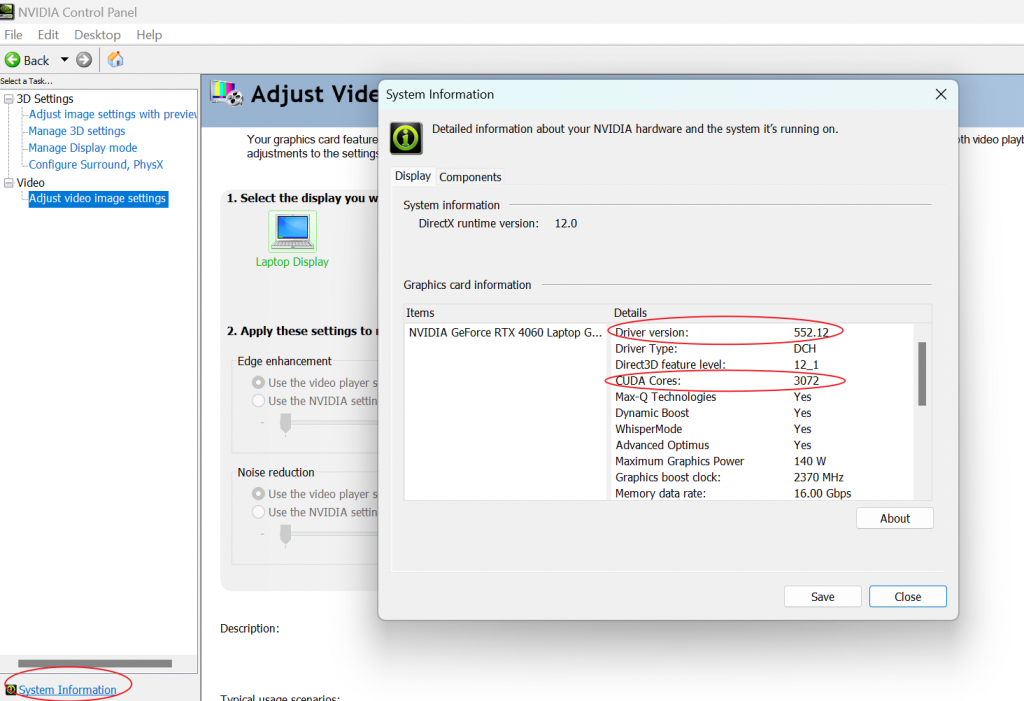
A better method is to use the NVIDIA Control Panel, which provides more precise NVIDIA internal settings and version numbers. Click ‘System Information’ at the bottom right of the NVIDIA control panel. You’ll find the driver version, which is 552.12 in my case. This is the version number of the NVIDIA driver component. It also shows that the number of CUDA cores is 3072.
2.3 nvidia-smi on Windows
Open a Windows prompt. Use where to show the path of nvidia-smi.exe. The CUDA version (12.4) shown here is the version of the CUDA toolkit.
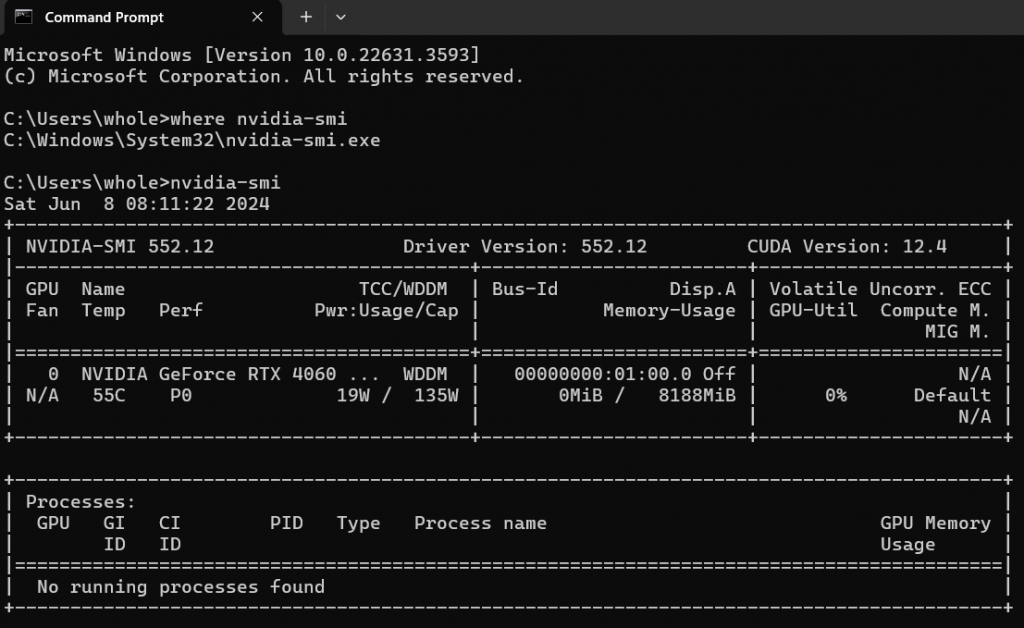
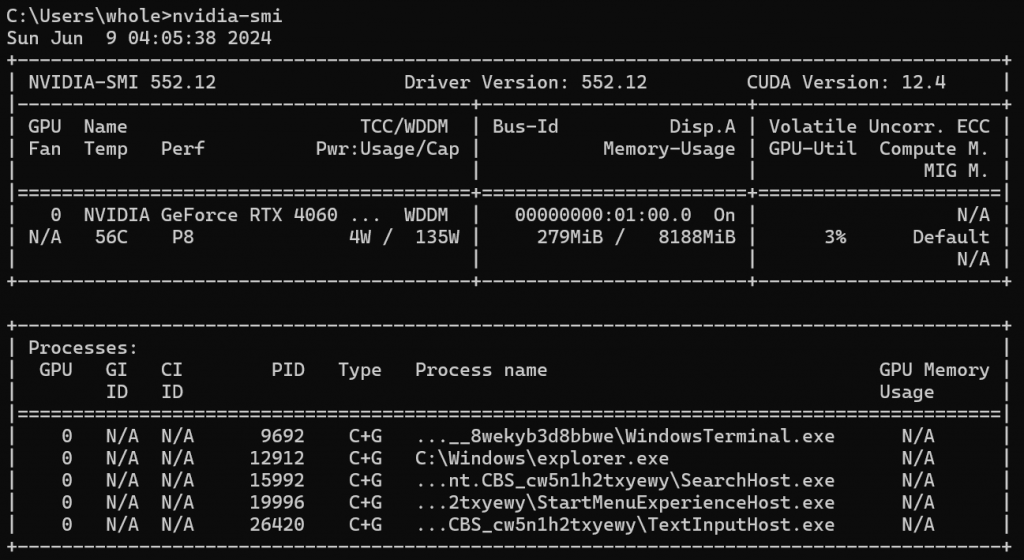
The above command shows that the NVIDIA card is not currently used to display images on the monitor. In the NVIDIA control panel, Manage Display Mode, set the mode to NVIDIA GPU only. You’ll see that the GPU is turned on, and the processes using it are also listed.
2.4 nvidia-smi on WSL
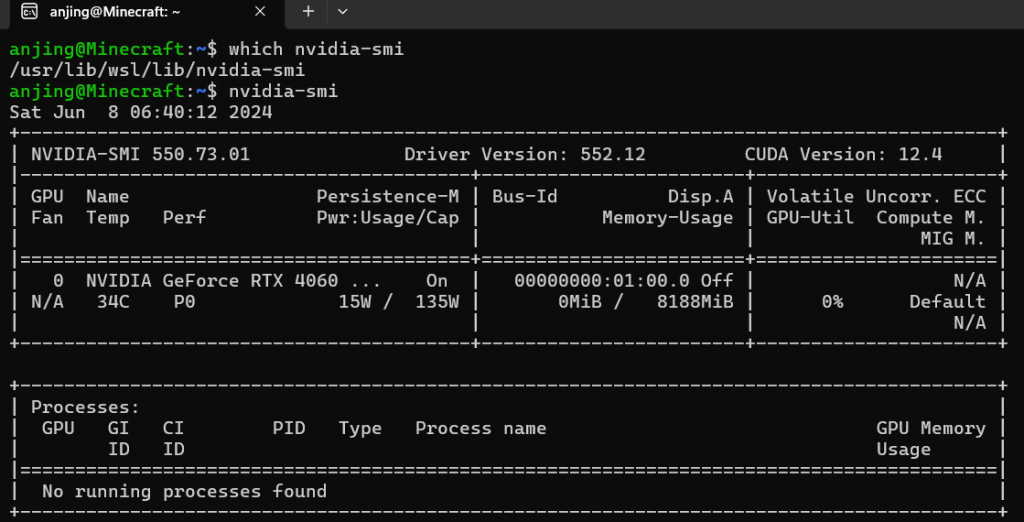
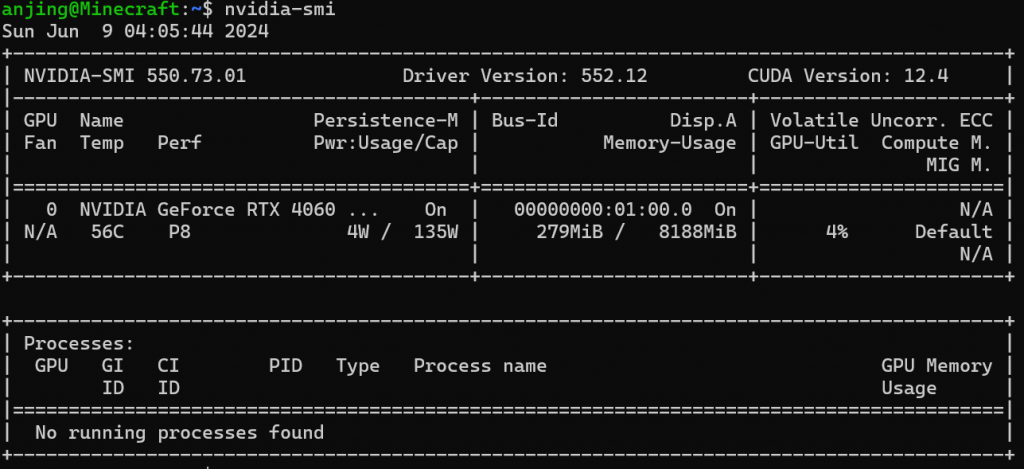
When the mode is switched to GPU only on Windows, it is also reflected in WSL. However, no processes are shown to use GPU as they are not invisible to WSL.
2.5 Do Not Install GPU Driver in WSL
As shown above, nvidia-smi in WSL already shows a proper driver and corresponding CUDA version. Per NVIDIA, ‘Once a Windows NVIDIA GPU driver is installed on the system, CUDA becomes available within WSL 2. The CUDA driver installed on Windows host will be stubbed inside the WSL 2 as libcuda.so, therefore users must not install any NVIDIA GPU Linux driver within WSL 2.
Again, you can use the where command to find the directory that contained stubbed NVIDIA libraries.

Do not install GPU drivers on Linux in WSL. You only need to install GPU drivers using ubuntu-drivers tool on a non-WSL Linux desktop or server. If you have installed ubuntu-drivers tool, you shall get an empty list when you try to list any GPU drivers.
sudo ubuntu-drivers list
3. Use PyTorch to Show the CUDA Version
Once we know that you won’t need to do anything for CUDA in WSL, a reasonable next step is to use CUDA to build your AI application. Pytorch is a popular framework that attracts lots of engineers and has a healthy ecosystem around it.
3.1 Install Pytorch
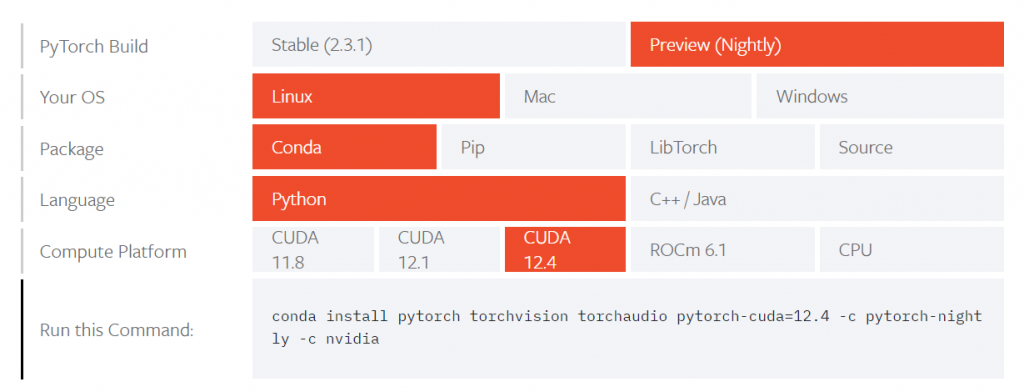
You’ll need to find the PyTorch installation command from its official download page. The PyTorch installation needs to match the correct CUDA version. When this article was published, no stable PyTorch version was available for CUDA 12.4. You must install the nightly build or downgrade the Windows GPU driver.
3.2 Show CUDA Version
Once you correctly install PyTorch, showing the CUDA’s version becomes a piece of cake.
import torch
print(torch.version.cuda)
4. Other Resources
Microsoft has worked hard to enable seamless integration of NVIDIA cards to WSL. This NVIDIA official guide, ‘CUDA on WSL User Guide,’ explains more details of this approach. There are also an excellent discussion thread on Askubuntu and a GitHub page about CUDA and WSL. Feel free to comment below if you have any questions or topics you want to discuss.

