

Introduction
Python virtual environment is an essential tool for managing different projects with varying dependencies. By isolating project environments, developers can ensure that different Python packages and versions do not conflict with one another. Virtualenvwrapper is a useful extension that further simplifies the process of managing virtual environments. In this blog post, we’ll explore how to use Python virtual environments and Virtualenvwrapper to manage your Python projects effectively.
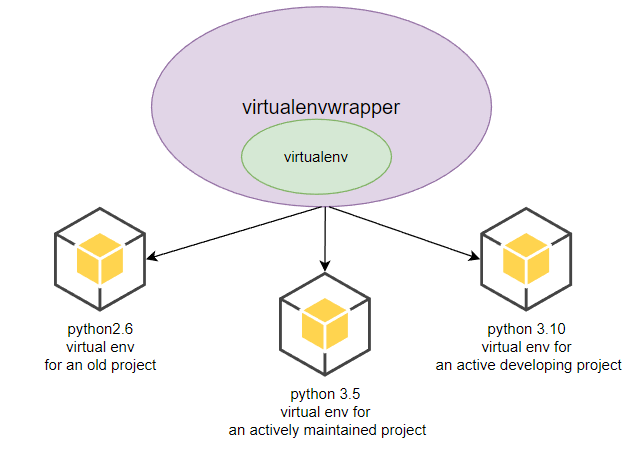
Virtual Environment by Virtualenv
First, ensure that you have Python and pip (Python package installer) installed on your system. If not, download Python from the official website.
If you are on Ubuntu, and need to install pip3, use the following command.
sudo apt update
sudo apt install python3-pip
Next, use root or one of the accounts with sudo privilege to install virtualenv.
sudo pip install virtualenvOn Ubuntu/Debian, you might need to install a system-wide pip package as follows.
sudo apt install python3-venv
Switch to your regular user account, such as helen, to start using the virtual environment.
python3 -m venv myvirFor python2, you’ll need to invoke virtualenv directly.
virtualenv --python="/usr/bin/python2.6" "/path/to/new/virtualenv/"This command will create a directory named myvir, copy and link globally installed python into a local copy. Then we need to activate it, and you’ll notice the added name before your username.
On Linux, locate the activate script and source it.
source myvir/bin/activate
(myvir) helen@myhost:
On Windows, execute the activate script directly.
myvir\Scripts\activate
(myvir) C:\Users\helen>
When you are done, you’ll need to deactivate it to exit from the virtual environment.
deactivateWell, it’s not so hard if you only have one or two virtual environments, and you do not often switch between them. The complexity comes when you are working on multiple projects and using multiple virtual environments. You might not even remember what their names are. This is when you need the vritualenvwrapper.
Setting Up and Using Virtualenvwrapper
Installation
Make sure you use sudo to install virtualenvwrapper in /usr/local/bin/. Otherwise, it’ll only be installed in the home directory of the user you’re running.
sudo pip install virtualenvwrapperOn Ubuntu/Debian, you might need to install a system-wide pip package as follows.
sudo apt install python3-virtualenvwrapper
For Windows users, install the Windows-specific wrapper:
pip install virtualenvwrapper-winConfiguring Virtualenvwrapper
To configure Virtualenvwrapper, switch to your regular user account. Then, add the following lines to your shell startup file, which is usually ~/.bashrc, ~/.bash_profile, or ~/.zshrc for Unix systems, and %USERPROFILE%/.bashrc or %USERPROFILE%/Documents/WindowsPowerShell/Microsoft.PowerShell_profile.ps1 for Windows:
export WORKON_HOME=$HOME/.virtualenvsexport PROJECT_HOME=$HOME/projectsexport VIRTUALENVWRAPPER_PYTHON=/usr/bin/python3
source /usr/local/bin/virtualenvwrapper.sh
Replace /usr/bin/python3 with the path to your Python executable, and /usr/local/bin/virtualenvwrapper.sh with the path to the installed virtualenvwrapper.sh script. For Windows users, replace source with source_win. You can find the paths by running which python and search virtualenvwrapper.sh using the following command.
find / -name virtualenvwrapper.sh
If you use Ubuntu LTS 24.04 or later, it is likely in the following directory.
/usr/share/virtualenvwrapper/virtualenvwrapper.sh
If you do not let virtualenvwrapper know which python it should use, it’ll give you the following weird error. Do not install any those packages, as it won’t solve the problem at all. Instead, make sure VIRTUALENVWRAPPER_PYTHON is correctly set.
created virtual environment CPython3.10.6.final.0-64 in 1059ms
  creator CPython3Posix(dest=/home/anjing/.virtualenvs/vir-autogpt, clear=False, no_vcs_ignore=False, global=False)
  seeder FromAppData(download=False, pip=bundle, setuptools=bundle, wheel=bundle, via=copy, app_data_dir=/home/anjing/.local/share/virtualenv)
    added seed packages: pip==23.0.1, setuptools==67.4.0, wheel==0.38.4
  activators BashActivator,CShellActivator,FishActivator,NushellActivator,PowerShellActivator,PythonActivator

Command '' not found, but can be installed with:
apt install mailutils-mh  # version 1:3.14-1, or
apt install mmh           # version 0.4-4
apt install nmh           # version 1.7.1-11
apt install termtris      # version 1.3-1ubuntu1
Ask your administrator to install one of them.
Restart your terminal or run source ~/.bashrc (or the equivalent for your shell) to apply the changes.
Manage Virtual Environment by Virtualenvwrapper
Once you installed virtualenvwrapper, you shall use it exclusively. The virtual environments created by virtualenv without the wrapper, cannot be managed by the wrapper.
Creating
To create a new virtual environment, use the mkvirtualenv command followed by the desired environment name. Please note you can always use the tab to help to complete the command if you do not want to type them all. If you do not want to use the default python defined in VIRTUALENVWRAPPER_PYTHON, use -p to specify another version of python.
mkvirtualenv -p [path/to/python/version] my_projectThis command creates a new virtual environment in the $WORKON_HOME directory and automatically activates it. You’ll notice your terminal prompt change to indicate the active environment.
Working on or Switching
To activate a virtual environment, use the workon command:
workon my_projectDeactivating
To deactivate the current virtual environment, use the regular virtualenv command deactivate:
deactivateListing
To list all available virtual environments, use the lsvirtualenv command:
lsvirtualenvDeleting
To delete a virtual environment, first deactivate it if it’s active, then use the rmvirtualenv command:
rmvirtualenv my_projectInstalling Packages
Once the environment is active, you can install packages using pip without affecting other environments or your system’s Python installation:
pip install some_packageConclusion of Virtual Environment
Python virtual environments and Virtualenvwrapper provide a powerful and flexible way to manage project dependencies. By isolating each project’s environment, developers can ensure that different package versions and dependencies do not conflict with one another. With Virtualenvwrapper, creating and managing virtual environments becomes even more effortless, allowing you to focus on your projects and their requirement.
If you have any suggestions, please leave a comment below. You may always learn more from our python tutorials.