

In this article, we’ll show you three ways to output embedded variables or user-defined variables, so you can see them and better understand Nginx. These three ways are as follows.
- return to the client as text;
- return to the client in the response header;
- log to access_log.
1. Print Nginx Variables on Web Browser
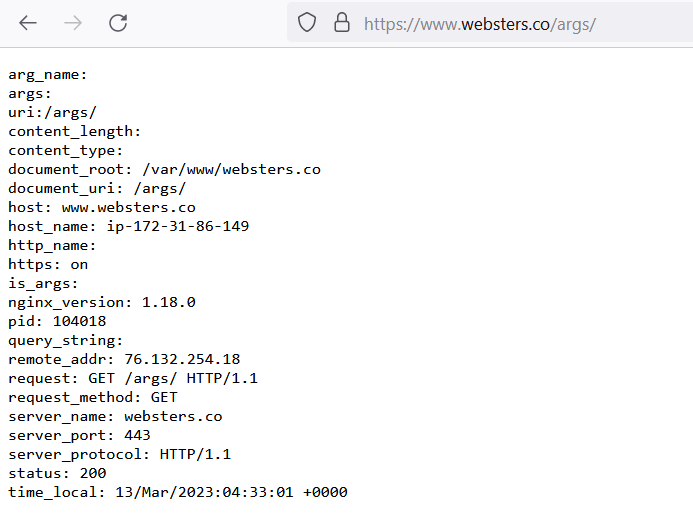
Add a location block inside your server block. Add a header to tell the browser what returns is plain text. Then return a string containing the variables you would like to output.
server {
        ...
        location /args/ {
                add_header Content-Type text/plain;
                return 200
"arg_name: $arg_name
args: $args
uri:$uri
content_length: $content_length
content_type: $content_type
document_root: $document_root
document_uri: $document_uri
host: $host
host_name: $hostname
http_name: $http_name
https: $https
is_args: $is_args
nginx_version: $nginx_version
pid: $pid
query_string: $query_string
remote_addr: $remote_addr
request: $request
request_method: $request_method
server_name: $server_name
server_port: $server_port
server_protocol: $server_protocol
status: $status
time_local: $time_local";
        }
You may copy the above block as it is. Then you’ll need to restart Nginx to load the new configuration by “sudo systemctl restart nginx”. Finally, in the web browser, use https://www.yourdomain.com/args/ to view the output. The following example was from websters.co.
2. Return Nginx Variables in Response Header
We can add another statement in the above /args/ location block, to squeeze a variable inside the response header.
location /args/ {
               add_header Content-Type text/plain;
               add_header print-NGINX-uri $uri;
               return 200
"arg_name: $arg_name
                ...
              }
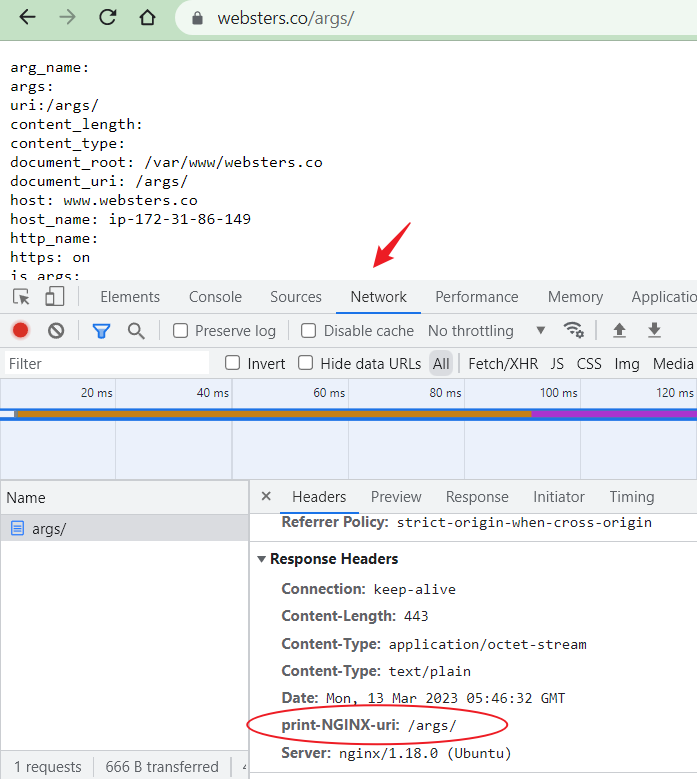
After restarting Nginx, still use the web browser to visit https://www.yourdomain.com/args/. Then in the debug window, take a look at the response.
If you are using Chrome, right-click on the webpage. On the menu, choose Inspect at the very bottom. Then click the Network tab. Request the address again, and you’ll see the print-NGINX-uri header in the response along with the value of $uri.
3. Log Nginx Variables in access_log
The default access_log’s format uses a predefined format ‘combined’. You may define a new log format, then make your access_log use the newly defined format.
http {
    log_format append_uri '$remote_addr - $remote_user [$time_local] '
                           '"$request" $status $body_bytes_sent '
                           '"$http_referer" "$http_user_agent" "$uri"';

    server {
        ...
        access_log /var/log/nginx/youdomain.access.log append_uri;
        ...
    }
}
Please note that log format has to be defined in http context. So you’ll very likely need to modify /etc/nginx/nginx.conf. Your server block should be in your website config, which is /etc/nginx/sites-available/yourdomain.conf.
After editing, you’ll need to restart the Nginx server too. Then use tail to take a look at the log with appended $uri.
tail -f /var/log/nginx/yourdomain.access.logNow, you’ll see the URI is appended at the very end of the log.

For more details about the Nginx log, you may refer to nginx_http_log_module and Configuring Logging.
Conclusion
If you just would like to check the variable once, just printing it back to the response might be the easiest way. If you have a PHP page, adding it to the response header might be suitable. If you need to trace the variable always, add it to the log to get constant monitoring. It’s really up to the use case to choose a method suitable for you.
If you have any other means, please leave a comment below.